| Doors are excellent ways for players to move between different areas of your module. Moving from one area to another is called a 'Transition', so you need to set up transitions between areas in your module. We're going to take the first step towards this now by looking at the door to the church.
Left-click on the door so the green wire box comes up around it, and then right click it and select 'Properties (new window)' from the menu: 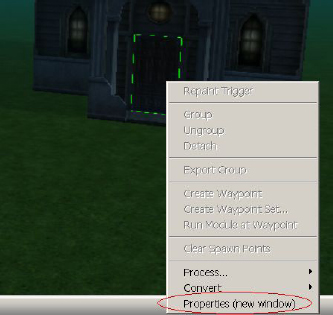
Note: If you select an object, it's properties automatically appear in the 'Properties' tab/box. So you can edit properties that way if you'd prefer. This will bring up the properties window for the door, which looks like this: 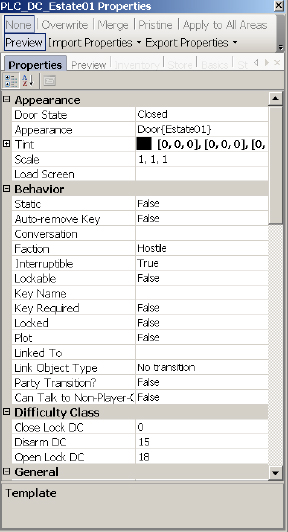
We'll start with the 'Appearance' category. The 'Door State' lets you specify if you want the door to start opened or closed. Closed is fine.
'Appearance' lets you choose a different looking door. At the moment, though, this only brings up errors, so we're stuck with 'Estate01' on the Church.
'Tint' again lets you change the colours of the door if you want to.
'Scale' should probably not be used for doors - they've got to fit in the doorframe! 'Load Screen' lets you choose a load screen to come up when the player uses the door to go to another area. This is not necessary, because you select load screens for each area anyway. It is just if you want to override the load screen that would normally appear for that area.
Under 'Behaviour' are some important options. Note this time 'Static' is false, because we want players to be able to interact with it. It's got options to lock the door and specify a key that opens it, but for now we want the door to be unlocked.
'Faction' is set to hostile by default - which just means players can bash down the door with no faction problems occurring. This should be left as is, unless you're controlling factions in a very advanced way.
Again 'Plot' stops players from being able to damage the door. Let's leave this as 'False', so players can bash their way into the church if they really want to.
The next part 'Difficulty Class' sets how difficult it would be to close the lock on the door (if there is one), disarm the trap on the door (if there is one), or open the lock on the door (if there is one). The higher the number, the harder it will be for the player to do that action. Since we don't want to lock or place a trap on the door, it doesn't matter what these numbers are. Now, I'm going to scroll down a bit to look at 'General'. The 'Tag' property here is vital to creating the transition. You can set the tag to whatever you want, as long as it is UNIQUE. It's a good idea to have a naming convention when writing tags. Here, I've written 'ChurchDoorIn': 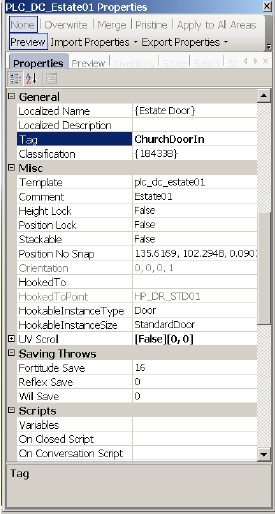
This area is now ready to be transitioned to. Scrolling down the properties box, even further, we see there's a section, 'Scripts', where we can attach more scripts to, a 'Shadows' category if we need to fine tune how shadows work, 'Statistics' (which will affect how hard the door is to bash down: the higher any of the numbers, the harder it will be to bash down), and 'Trap' where you can place a trap on a door and select its properties. 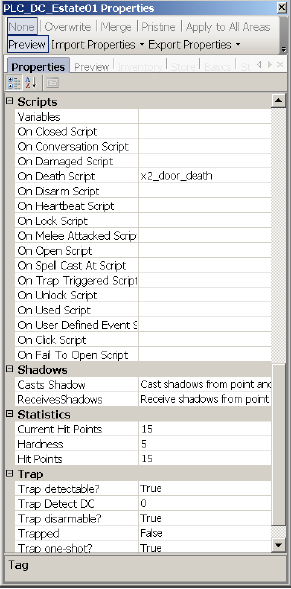
Thats one side down, now we need to create another area (seeing as this example is an exterior door to a church we should create a church interior). Now we're ready to join the two areas. The first step is to place a door in the doorway. Move the camera around until you've got a good view of your doorway: 
Now select 'Blueprints' from the right of your screen again, and then select 'Doors': 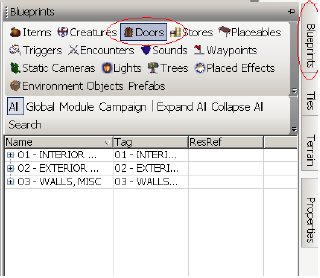
For this door, let's select 'Interior', and then choose 'Castle Door 1' from the list: 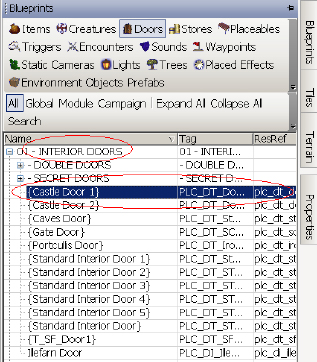
You can now place it down in the doorway. Note: I had some trouble trying to place down my door. I had to left click and drag the mouse around a bit to get the door to appear, and then hold down CTRL and left click to actually place down the door. If the door disappears when you change to 'Select Objects', it means it didn't actually place down the door. Try again. Snap! If you have trouble placing down the door, you might want to select the 'Snap' button in the menu. When the door is placed correctly, it should be highlighted with a green wire box: 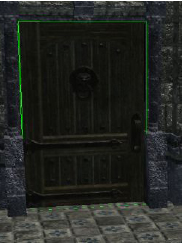
Right click on the door and select 'Properties'. The same properties box will come up for this door as did for the church door in the outside area: 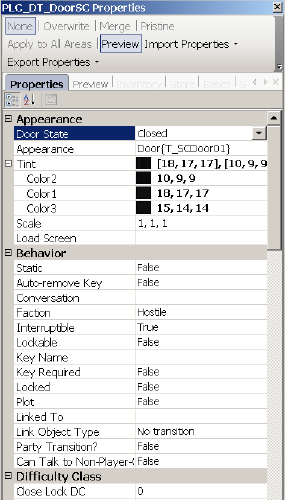
To set up a transition, we need to do a few things. Firstly, change 'Tag', under 'General', to something UNIQUE. I'm going to call it 'ChurchDoorOut': 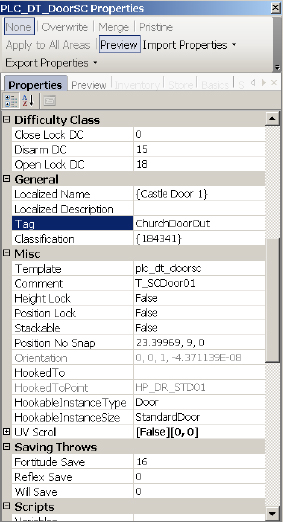
Secondly, scroll to the 'Behaviour' Category, and look at the 'Linked To' and 'Link Object Type' fields. These are the two vital properties for transitions. 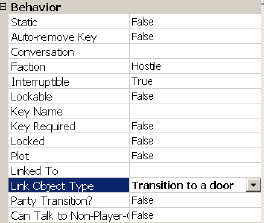
Change 'Link Object Type' to 'Transition to a door', as in the above picture. Then, under 'Linked To', we need to tell it which door to transition to. So type the tag you gave to the outside church door here. I called mine 'ChurchDoorIn': 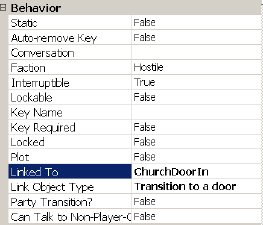
Now when the player walks through the door, they will appear by the door outside of the church. We're also going to have to repeat these steps for the outside door so open the area where you placed the church in. Then select the door to the church, right click it and select 'Properties (new window)': 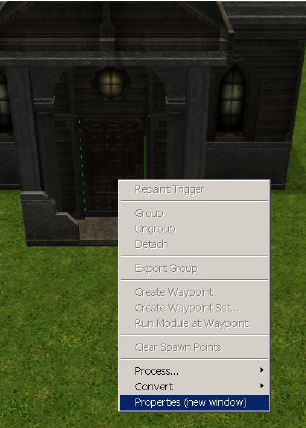
Scroll down to 'Linked To' and 'Link Object Type' under behaviour again. Select 'Transition to a door' for 'Link Object Type' again. This time, for 'Linked To', we want the tag of the inside door. So I'm going to type in 'ChurchDoorOut': 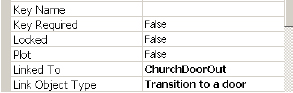
Done! The player should now be able to enter and leave the church through the doors. |