| This guide has been taken from Feargus Urquhart blog which can be found here.
Scott Everts, Designer Extrodinaire, checked out the Placeable Walkmesh Helper made by Zarathustra217. Since ScottE checked it out we did make a couple changes to the object and are including it in the 1.05 Update to the game. This is what ScottE had to say about the Walkmesh Helper, which can be found here.:
Zarathustra217 has created a wonderful placeable element in the form of a solid invisible square that cuts out the walkmesh. I was asked to check it out and I’m very happy to say it works great and makes complex walkmesh issues much easier to deal with. It also allows you to make flat placeables walkable that weren’t originally intended to be!
I’m going to show an example of a complex walkmesh issue in the editor that this placeable made much easier to deal with.
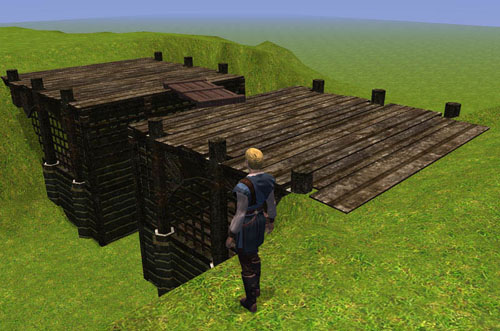
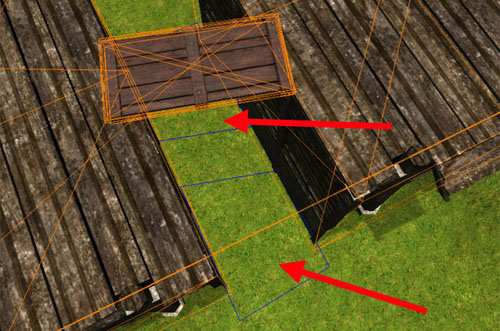
In this example we have a bridge in three parts. Two ends and a plank connecting them. Normally this would be a problem of mind bending complexity!
First Turn on “C2 Data” under the Collision pull down menu so you can see it.
After making sure both bridge ends are the exact same height I put down one of the new Walkmesh helpers.
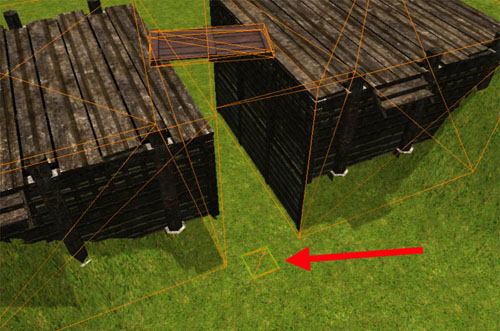
Using the Scale option in the Placeable Properties I adjusted the length and width until I got it to match up with the top of the bridge. I then raised it up just a hair above the bridge sections. Use the green selection box as a guide since all those boxes can get confusing!

One issue you need to be careful of is the walkmesh helper will completely override the terrain walkmesh. So the edge of the bridge should be flush with the terrain or as close as possible. If the terrain slopes over the bridge end your character will walk into the terrain until they leave the helper’s area.
Now that we have our rectangle sized, placed, and positioned we have to deal with that joining plank in the middle. Currently we have two issues to deal with. The plank is above the bridge level and the open air on either side is walkable. To deal with the first issue lets place another Walkmesh Helper. This one we will size to the plank and raise/rotate to match.
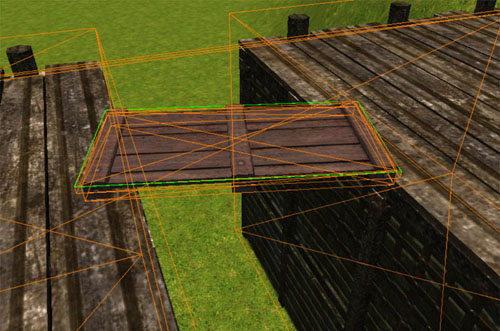
The nice thing about the helper is you can stack them on top of each other. Your character will snap up to the highest one so works well for uneven terrain. Though you should take care not to go nuts with these. If you layer a ton of these the pathing might not work well and might not bake correctly.
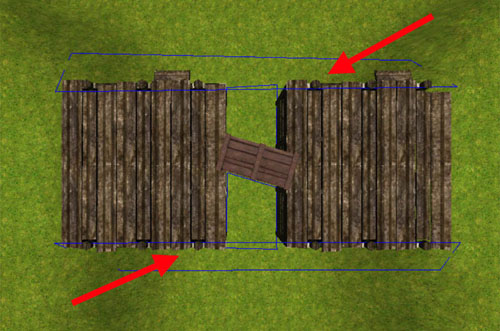
Our next problem is the open sides. This is easily taken care of by placing Walkmesh Cutters. These are listed in the Triggers section under “Empty”. You place them like a trigger and they will etch out the walkmesh exactly like they are shaped. They always override all other walkmesh cutting so they are good for your final fine tuning.
Getting these lined up will take a few tries since triggers conform to the ground terrain while your bridge is way up in the air. I did a few quick level bakes to fine tune them.
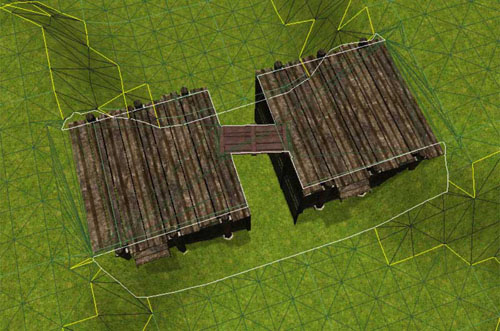
So we appear to be done and a quick bake and jump in the game shows all is working great! But there appears to be a few issues.
The bridge sides are open to the terrain below so our character walks off the sides and pops down to the chasm below! Ops! Easy enough to fix. Just put some Walkmesh Cutters on either side of the bridge to block it off.
Also the bridge sections have their own walkmesh which we replaced but is still cutting out and doing strange things. So I flagged the two bridge ends and plank as Environmental Objects so only our Walkmesh Helper & Walkmesh Cutters are doing all the work. No sense making the engine more confused!
Here’s our level walkmesh after being baked.
A quick jump into the game shows that my character walks perfectly from land to bridge. And properly walks up the plank. Not bad and pretty fast to layout. |