| In this tutorial, I am going to show you how to create your own custom store. The toolset comes with a number of predefined stores, but they may not meet you needs. However, you have the power to create your own. First thing you need to do is to click on the Blueprints tab and then the Stores button: 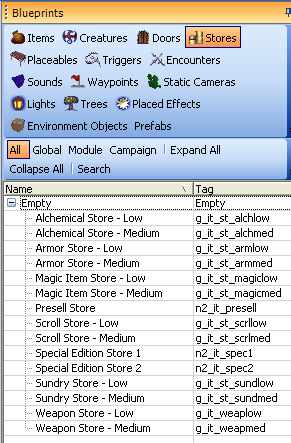
Right-click underneath the last listed store to bring up a small pop-up menu: within that menu, go to "Create Blueprint," and select "Module" (this is unless you wish to create a store that is usable in any module: if you want to do that, select "Global" instead): 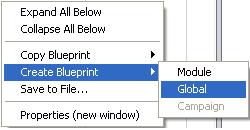
You will notice that you have a new store at the end of the list, like so: 
Now lets take a look at the properties of this new store by clicking on the properties tab: 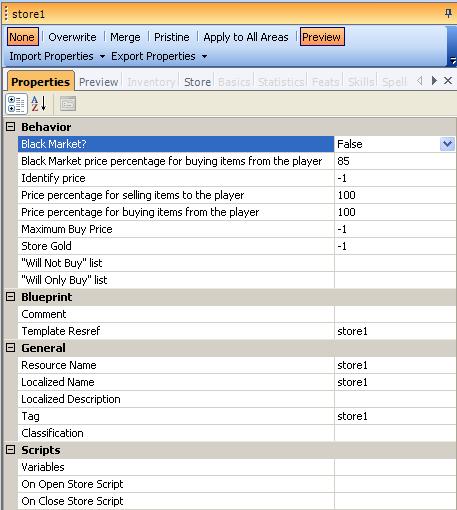
Black Market?: If this is set to TRUE then the store will buy items that are marked as Black Market or Stolen Black Market price percentage for buying items from the player: The percentage of the items value that the store will buy the item for if it is marked Black Market or Stolen. Identify Price: How much the merchant will charge to identify an item. Price Percentage for selling items to Players: The percentage of the items value that the store will sell the item to the player. Price Percentage for buying items from the player: The percentage of the items value that the store will buy the item from the player. Maximum Buy Price: This is the maximum amount the merchant will buy an item from the player. Store Gold: This is the amount of gold the merchant has to purchase items from the player. "Will not buy list": This is where you can make a list of items that the merchant will not buy from the player. Click on the ... button and then either double click on the item or a single click and then hit the Add button. Once finished click on the OK button. "Will Only Buy": Opposite of the above.
Once we have set our properties for the store, we can now add what items the store has in stock. To do this we need to click on the Store tab and as you can see it is empty: 
At the bottom of the Store tab are 5 more tabs (Armour, Miscellaneous, Potion, Ring and Weapon) plus an edit button: 
Click on the edit button to get the following pop up box: 
Now this is where we have to be careful as in selecting the right tab on the left hand side and the items we are going to add on the right. The store would look stupid and also confusing to the player if we had scrolls or weapons listed under the Armour tab. In this example I am going to make a Shoemaker Store (i.e. the merchant will just sell boots) so I will need to drill down in the Armour Items on the right hand side and then click on the plus sign that is beside the Boots heading. Now you can just left click the top Boot listed (Plate Boots) and then you can click on the Add Item Button, which will add the Boots to the Armour tab on the left hand side. You can of course add more than one item by clicking on the first item that you want and then hit the SHIFT key plus left clicking on the last item. This will now highlight all the items including and in between the first and last item. You can also hit the CTRL key and left click to select a number of items as well. 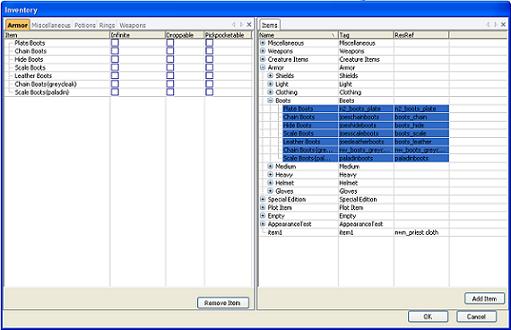
If you add the wrong item, you can select the item on the right hand side and then click on the Remove Item button. Once an item has been added we can make the store have Infinite amounts of that particular item, make the items Droppable or for you rogues out there Pickpocketable. Once you have finished adding/removing items, click on the OK button and you will now see items listed under the Stores tab (make sure you select the right tab for the item i.e. Armour, Weapon, etc). Click here to learn about how to add your new store to your module. |