Credit is given to BenWH (DLA) for inspiraton and to SorceressAshura as I used their Snow Effect visual data for this tutorial (the VFX can be found here). The Visual effect editor is a plugin so to open it, click on Plugins in the top menu and then Visual Effects Editor: 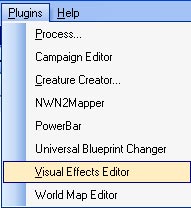
You now have a blank canvas and BenWH mentions that it is easier to work with an existing effect than to start from scratch, which I wholeheartly agree with. To see existing effects you will need to extract the files from NWN2_VFX.zip in the C:\Program Files\Atari\Neverwinter Nights 2\Data directory (this is if you accepted the default install). The effects are also based on textures which can be found in the same directory called NWN2 Materials zip For this example I am going to start from scratch (only because I am cheating a little by using SorceressAshura snow effect). Click on File - New - Particle System: 
You will now see a fire effect in the editor that looks similar to this: 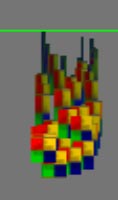
To the right hand side you will see the properties of this effect: 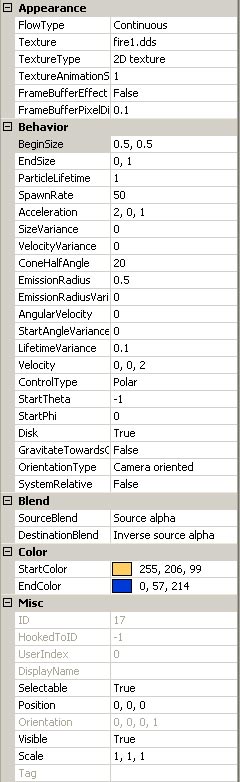
Lets start to explain what some of these fields mean and also what changes we need to make for our snow effect:
FlowType: Fairly straight foward as we have two choices: First is Continous, which snow generally is or Explosion. Leave it as Continous for our example. Texture: What texture are we going to us for our effect. If you open the NWN2 Materials.zip there are loads in there. For our example we are going to use fx_hail.dss. TextureType: With have 4 choices here (2D, 3D, Cubic and Null Texture). Lets choose 3D for our snow effect. TextureAnimationSpeed: This controls the amount of frames per second that are displayed BeginSize: This is the size of your particles at the beginning of the animation. EndSize: This is the size of the particles at the end of the animation. For this example change the end size to 0.1, 0.3. ParticleLifeTime: Is how long the life time of the particle is. Mess around with this figure, but for our example change it to 5 and you will see that the particle has increased in height. SpawnRate: For our example set this to 150. For testing set this to 1 and see the effect and then 10 and you will get the idea what SpawnRate is. Acceleration: These are set up 0,0,0 ie. the first number refers to x-axis, next is the z-axis and the last is the acceleration itself. A positive number will make the particle go up and a negative will make it go down, which snow falls down so set these values to 2, 7, -10. Velocity: works in the same way as Acceleration. For our example set this to 0, 0, 2. EmissionRadius and EmissionRadiusVariance: Set your EmmisionRadius, in this case how far from the central point your particles are spawned (use the variance property to vary it). For our example set both to 50. ConeHalfAngle: For our example this is set to 20, if you want your effect wider at one end, give ConeHalfAngle a number up to 180 (I think, might be 90) StartAngleVariance: This determines if your particles fire at right angles to the ground (0), or at varing angles (as you set it). You cannot actually see the effects of these settings without Velocity, which you have to set first. ControlType: This sets up the general 'look': pick cartesian if you want the effects to sort of fly away from the point of production, select polar if you want an effect that is centered on an invisible point (like a tornado), select spherical if you want a sphere. Use Cartesia for our snow example. StartTheta to -1. This stops each particle being created in the same place Disk: TRUE seems to determine if the particles are spawned in a flat plane or not. Start and End Colour: Should be self explanitory and in our example they are both going to be white. Leave yellow snow alone. The effects property should look something like this: 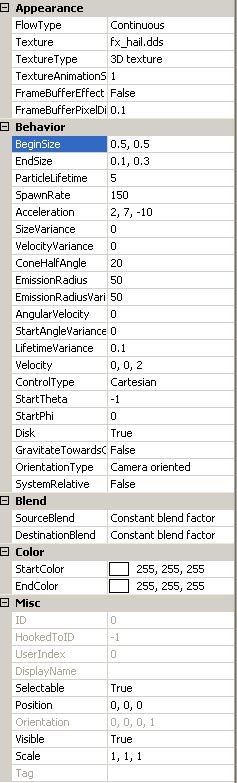
Now save the effect in your campaign directory and do not forget to make a backup. We cannot use our effect yet until we create a SEF file (Special Effects) and to do this click on File - New - Special Effect (SEF): 
Now click on Add Event and then on Particle System: 
Under name you will see an empty line so click on that and then you will get a properties tab underneath it: 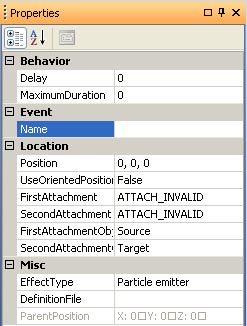
For our snow effect there are two fields that we are interested in. The first is the DefinitionFile so click in this field and then find the effect that you saved above. The second is the Position field change this to 0, 0, 50 and then press the Play button to see your new effect in action. Now save your SEF file in the campaign folder and of course back it up. Last thing we need to do is to add the effect to our toolset.
Close the effects editor (File - Exit). Click on Blueprints and then Placed Effects. Select any placed effect blueprint in the main toolset and then right click and then left click copy blueprint - Module. Now select the copied Blueprint and then look at the properties: 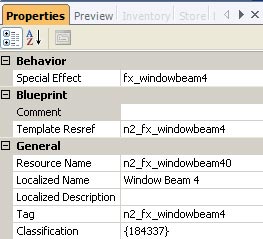
As you can see I chose to copy the Window Beam 4 effect. Now click on the Special effect field and then change this from fx_windowbeam4 to the saved name you used earlier. Whilst we are here also change localised name, tag and resref. Place the snow effect in your area and it should now be snowing. |